Intro
For quite a while I’ve relied on an USB drive to perform my Proxmox backup. It was a 3.5 HDD, so it required external power. To save cost I used a Shelly Plug S to power-up and down the HDD. This solution had a couple of drawbacks:
- It was not reliable. From time to time Proxmox failed to mount the USB drive, making the backup on the local disk and filling it.
- I could not keep more than 2 backups because the classic backup feature of Proxmox does not perform any deduplication on the data.
So, it was time to try PBS, but on what device? On what storage? I had this Juniper box laying around, it was never used in the last 4 years. So why not to give it a purpose?
The Juniper Box
The Juniper box is quite old. To be precise it’s a Juniper STRM500, where STRM stands for Security Threat Reponse Manager. It was an appliance to collect and correlate logs for security alerting. When I got it, it was running a custom version of CentOS 6 and I don’t know which version of the QRadar software. The hardware specs are:
- 2U rack case
- Intel Core 2 Duo E4600
- 8GB RAM DDR2
- 2x3.5 HDD slot
- 4x1Gbps NIC
definitely not cutting edge hardware :D
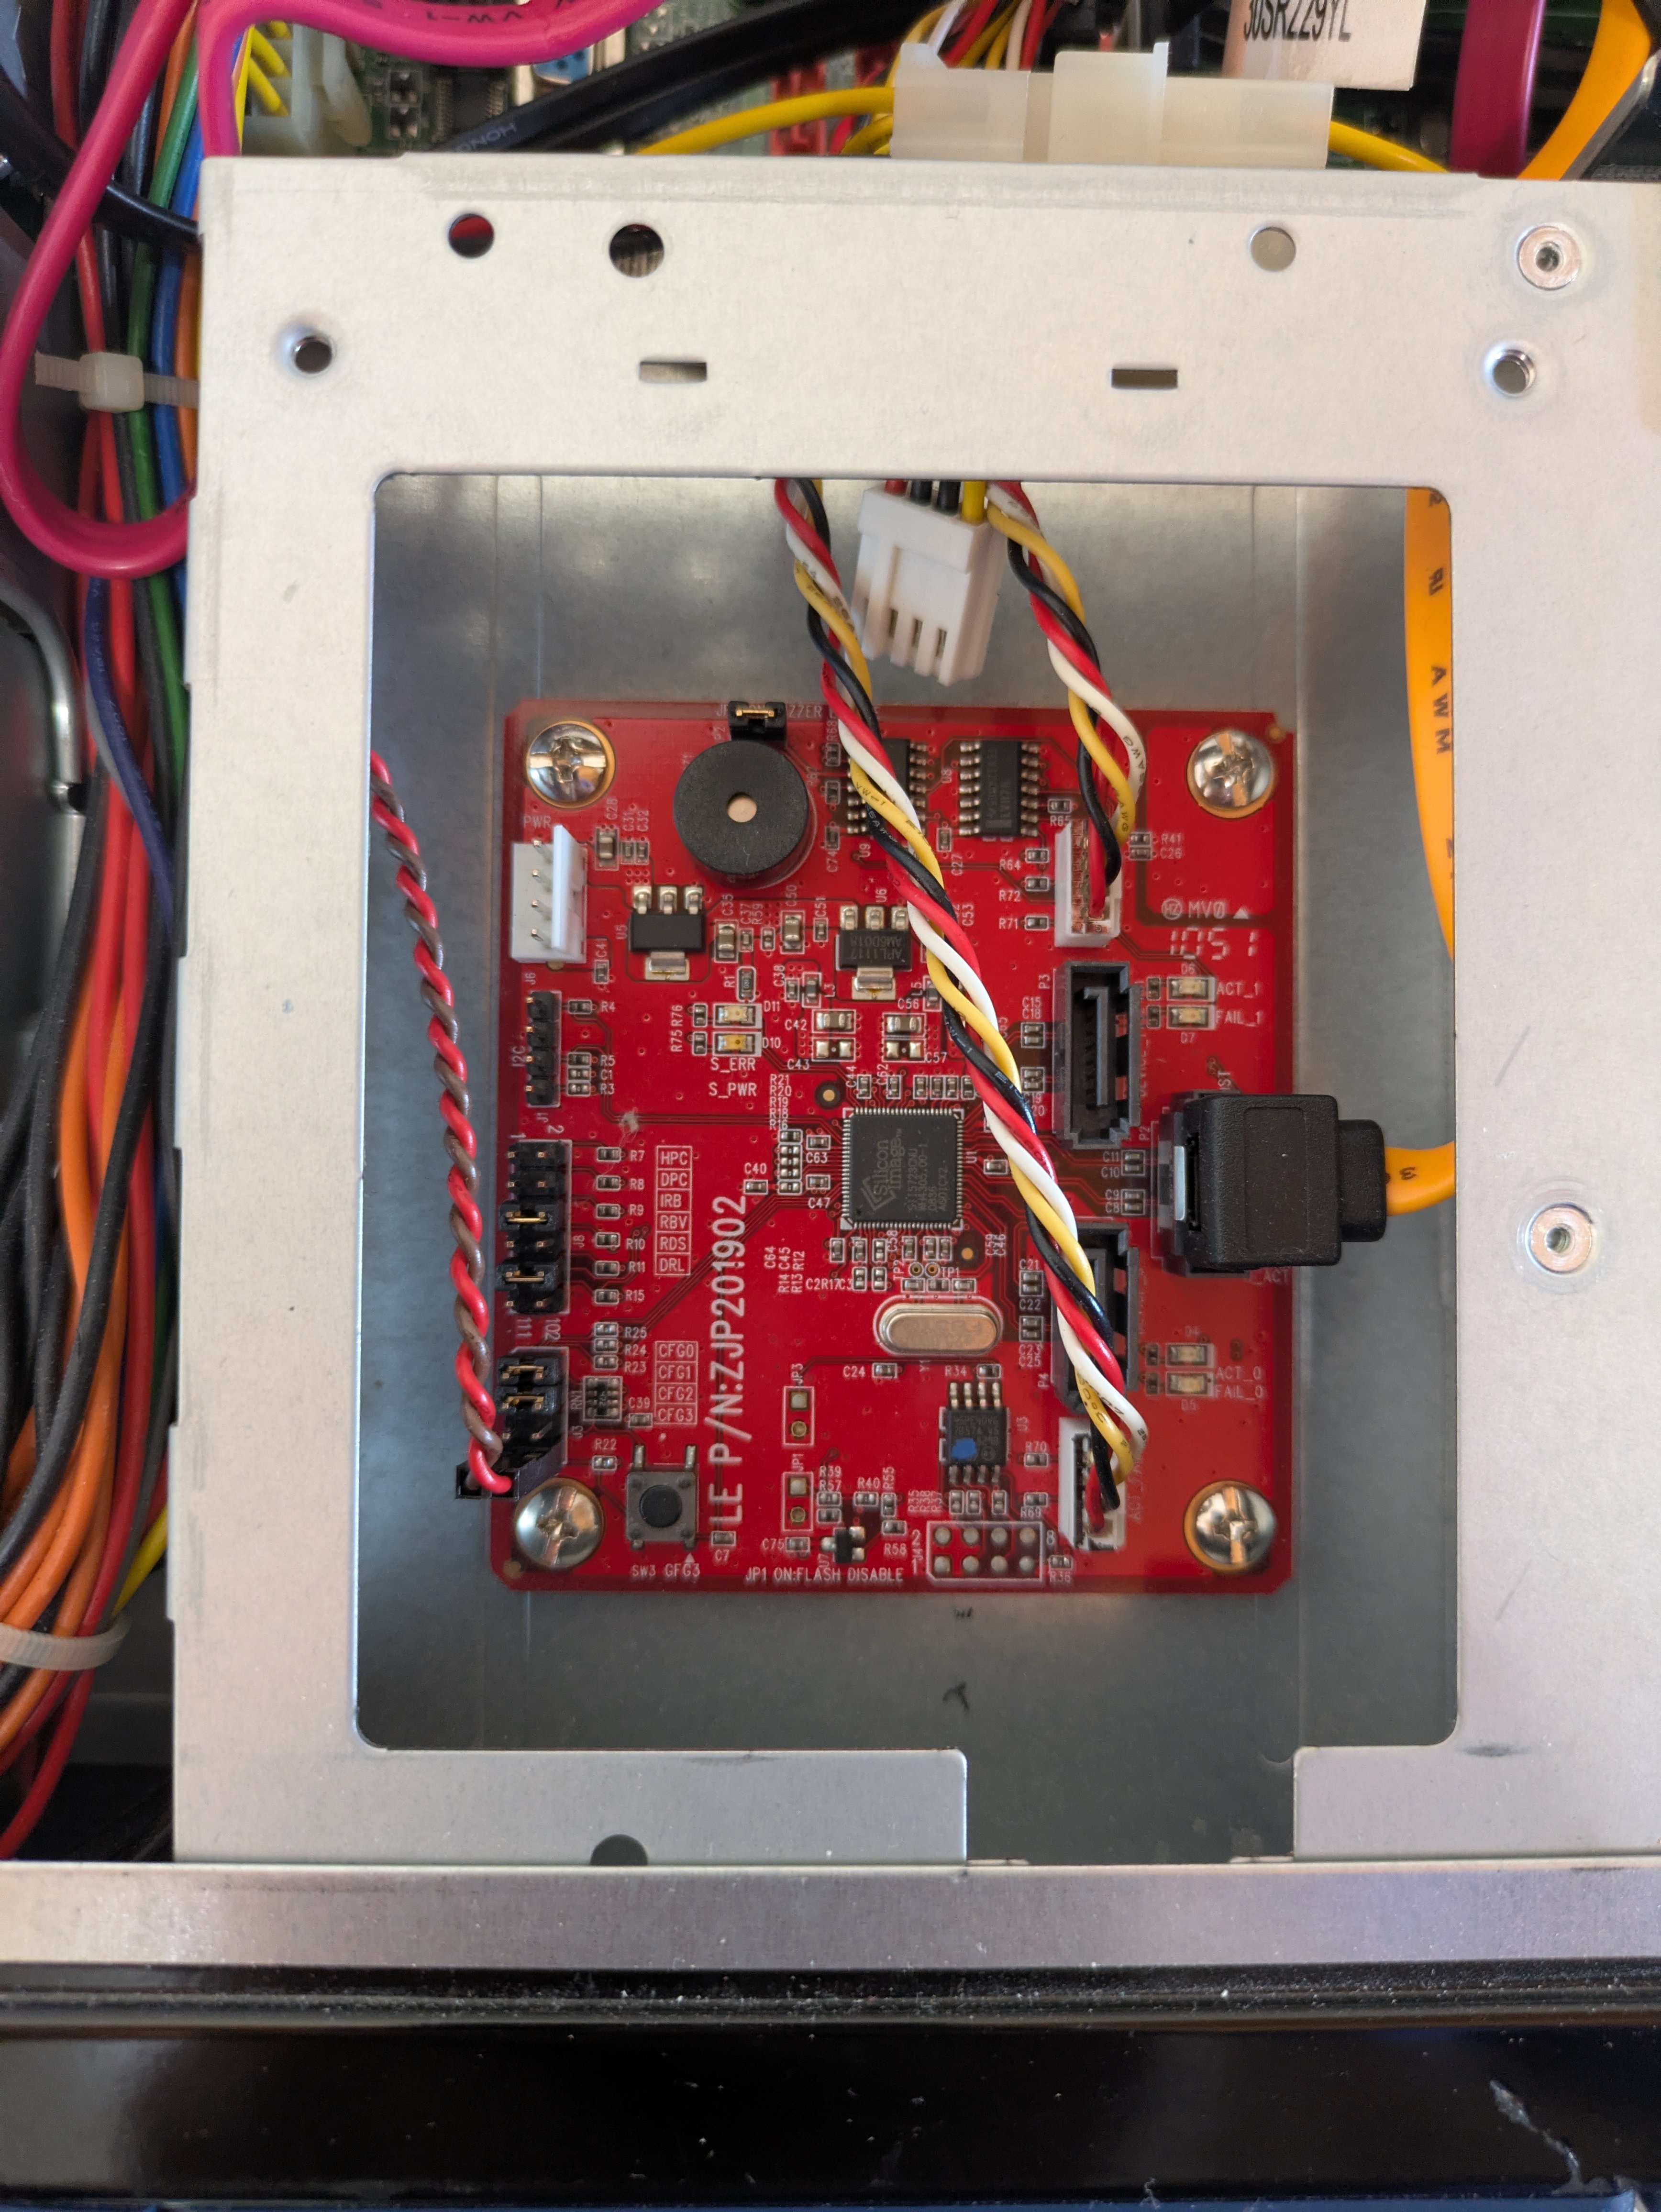
I had 2x4TB HDD laying around, so I installed them in the Juniper box, which was not happy and started to scream with a very loud beep.
Looking at the BIOS there was nothing that made me thinking could help shutting down the noise. According to Gemini I was suppose to run commands in the OS shell, but I did no trust it. I’ve opened the top lid and found that there was an hardware RAID controller with a speaker. Since I wanted to manage the raid via software, I’ve connected the HDD straight to the motherboard and remove power from the RAID controller. Puff, beep gone :D
Then, when I took the picture for this post, I’ve realised that there was a jumper on the raid controller to disable the built-in speaker. Nevermind, I didn’t want to use it anyway.
PBS Installation
PBS installation was quite easy. Boot the installer from an USB stick and just follow the installation wizard.
PBS Configuration
Even the configuration was quite simple.
Step 1 - Configure the datastore, the destination of your backups.
In my case it was easy, I just had 2x4TB HDD, the logic choice was a ZFS mirror. I’ve created the mirror and leaving the default options it was automatically added as datastore.
Step 2 - create a new user on PBS server.
Root user should not be used for backup jobs, so its credentials are not spread where they should not be. The correct role for a backup user that can also prune the jobs is DatastorePowerUser. You can then limit the Datastore to which the user has access to, if you have more than one.
Step 3 - Get the info
Get the PBS server fingerprint. It’s needed to confirm PBS identity when you add it as storage on PVE cluster. Also note the name of the Datastore where you want your backup to be saved on.
PVE Configuration
There are 2 main steps to follow for PVE configuration
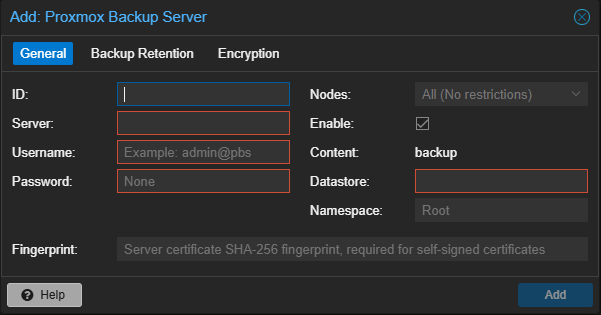
Step 1 - Add a new Datastore
To use PBS as a backup destination it has to be added as Dastaore in your PVE server/cluster. Here’s where you need the PBS fingerprint, username, password and the Datastore name.
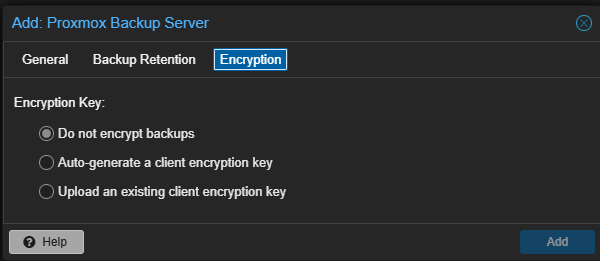
You can optionally enable the encryption with a newly generated key or with one you can provide. If you choose to generate the key you can then download it so you can keep it safe in case you need to restore any backup.
Step 2 - Configure a Backup Job
Here’s there is nothing more than configuring a backup job with other destination. You have to choose what to backup and when. As per best practice, the retention should be configured on PBS
First Backup Job
I have a pretty simple setup, where almost all the storage runs on NVMe SSDs:
- VM100 with 3 different disks
- 80GB
- 130GB
- 200GB
- VM101 with 3 different disks
- 20GB
- 250GB
- 1TB (traditional HDD)
- VM102 with 1 single disk
- 20GB
- VM105 with 1 single disk
- 20GB
The time of the first backup job, over a single 1Gbps link was the following:
INFO: Starting Backup of VM 100 (qemu)
INFO: backup is sparse: 24.00 GiB (5%) total zero data
INFO: backup was done incrementally, reused 78.34 GiB (19%)
INFO: transferred 410.00 GiB in 6825 seconds (61.5 MiB/s)
INFO: Starting Backup of VM 101 (qemu)
INFO: backup is sparse: 680.81 GiB (52%) total zero data
INFO: backup was done incrementally, reused 693.45 GiB (53%)
INFO: transferred 1.26 TiB in 14826 seconds (89.4 MiB/s)
INFO: Starting Backup of VM 1012(qemu)
INFO: backup is sparse: 12.09 GiB (60%) total zero data
INFO: backup was done incrementally, reused 12.09 GiB (60%)
INFO: transferred 20.00 GiB in 91 seconds (225.1 MiB/s)
INFO: Starting Backup of VM 105 (qemu)
INFO: backup is sparse: 13.39 GiB (66%) total zero data
INFO: backup was done incrementally, reused 13.82 GiB (69%)
INFO: transferred 20.00 GiB in 67 seconds (305.7 MiB/s)
Total duration was 6h 3m 53s.
Considering the destination storage speed, the network link and the PBS server hardware, I think it’s pretty decent result.
The following backup jobs took way less, since they are incremental and there is no much changes from the past backup.
Final thoughts
This was a task I had in mind for some time: try PBS. Also I wanted to give a purpose to that old Juniper Box, even though I thought the hardware was too old. I’m glad I finally found the time to play on this, so now I can have a more reliable backup and a PBS instance to play with.
So, even if the hardware it’s old, it can still have a purpose, especially in these crazy days of skyrocketing RAM prices.